Hello there, In this articles we are going to explan about Integrate Payment in Flutter with Stripe after successfully done payment with test mode and live mode. Nevertheless, I became aware that I hadn’t published anything in a while and promised to write at least two pieces in December and to be more consistent going forward. I thus request that each and every one of my readers hold me responsible.
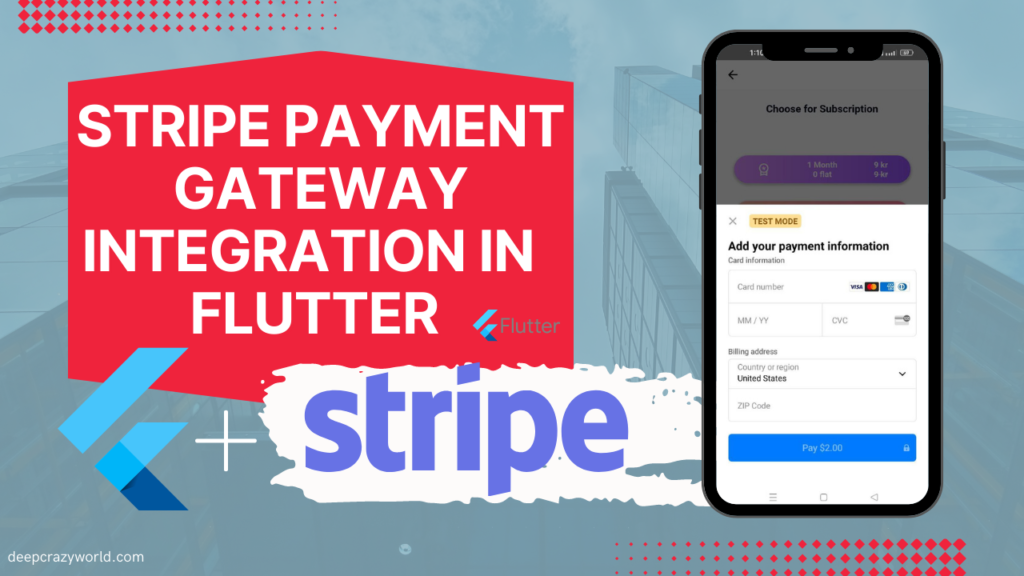
The topic of today’s article is using Stripe to manage payments in Flutter Stripe Payment gateway integration in Flutter 2023. Payment was one of those functionalities, and they naturally intended to utilise Stripe. I, on the other hand, had never integrated Stripe into Flutter before, but I wouldn’t let a challenge get the better of me, so I accepted the assignment and set to work conducting my research. I had to gather this information from a variety of sources, but I’ll do my best to make this post as informative as I can so you won’t have to look elsewhere for the answers to this question. Let’s get started; enough with the winding stories.
ABOUT STRIPE:
First, a little introduction to this fantastic payment system, Stripe. Millions of businesses, including Shopify, Instacart, and some of our major internet corporations like Google, Amazon, and others, utilise the Stripe payment gateway. They offer a straightforward and streamlined method for companies and their customers throughout the world to receive and transmit payments. They also provide further services like creating invoices, processing recurring payments, providing reports on finances that are intelligent and diagrammatic, and more.
Demo watch now : Integrate Payment in Flutter with Stripe
As a developer, I found Stripe’s ease of integration into a variety of stacks, the libraries that enable it, and its support for native payment methods like Apple and Google pay to be very intriguing.
STEP 1:
We would need to generate an API key from Stripe in order to begin. You would require setting up a Stripe account in order to achieve this. Log in to your dashboard now, switch to Test mode for integration and testing, and then select Developers > API Keys to view your API keys (Publishable and Secret Keys).
Stripe Documentaion Official Site: https://stripe.com/docs/keys
These are the Stripe Test Mode Secret Key and Publishable (use these key for Payment gateway testing)
NOTE: ADD OWN TEST/LIVE SECRET KEY AND Publishable KEY
Secret:
sk_test_tR3PYbcVNZZ796tH88S4VQ2u


Publishable:
pk_test_51BTUDGJAJfZb9HEBwDg86TN1KNprHjkfipXmEDMb0gSCassK5T3ZfxsAbcgKVmAIXF7oZ6ItlZZbXO6idTHE67IM007EwQ4uN3
STEP 2:
Flutter plugin add environment setup:
The following packages should be included in your dependencies:
flutter_stripe: ^7.0.0
flutter_dotenv: ^5.0.2
http: ^0.13.5
Flutter PUB.DEV , Add these plugin updated version from flutter official site.
- Flutter Stripe : https://pub.dev/packages/flutter_stripe
- flutter_dotenv: https://pub.dev/packages/flutter_dotenv
- http: https://pub.dev/packages/http
The flutter stripe package will be used by us because it relieves the stress of having to create our own payment modal by giving us a lovely one that already has all the fields and customization we require. Additionally, it enables you to scan your card to retrieve its details and has dark mode (wink wink). To set up the extra configurations needed for the flutter stripe package on Android, go to their instructions here.
To communicate with the Stripe API, we’ll be using http, you may handle your API calls using dio or any other package of your choice if you like.
To safeguard our Stripe Keys, there is also the flutter dotenv package. To keep them secure and protect you and your users from danger, I advise storing your keys in a.env file. How will we go about doing that?
Create a .env file
assets folder like this:
Put your Stripe private key in your.env file in the following manner:
STRIPE_SECRET = sk_test_tR3PYbcVNZZ796tH88S4VQ2uAdd your .env path to your assets in pubspec.yaml code
STRIPE_SECRET = sk_test_tR3PYbcVNZZ796tH88S4VQ2uassets:
- assets/.envAdd your .env to gitignore
#Dotenv
.env
STEP 3:
main.dart
Add here in main.dart , add publishableKey (Test Mode for testing purpose and Live url for Original Payment)
 Stripe.publishableKey = "pk_test_24PsRoB2O46Bxxxxxxxxxxxxxxxxxxxxxxxx";

  await dotenv.load(fileName: "assets/.env");
#Dotenv
.env
main.dart
void main() async {
  WidgetsFlutterBinding.ensureInitialized();

  Stripe.publishableKey = "pk_test_51BTUDGJAJfZb9HEBwDg86TN1KNprHjkfipXmEDMb0gSCassK5T3ZfxsAbcgKVmAIXF7oZ6ItlZZbXO6idTHE67IM007EwQ4uN3";

  //Load our .env file that contains our Stripe Secret key
  await dotenv.load(fileName: "assets/.env");

   runApp(const MyApp());
    }
main.dart complete code
import 'package:flutter/material.dart';

void main()  async {
  WidgetsFlutterBinding.ensureInitialized();

  Stripe.publishableKey = "pk_test_51BTUDGJAJfZb9HEBwDg86TN1KNprHjkfipXmEDMb0gSCassK5T3ZfxsAbcgKVmAIXF7oZ6ItlZZbXO6idTHE67IM007EwQ4uN3";

  //Load our .env file that contains our Stripe Secret key
  await dotenv.load(fileName: "assets/.env");

      runApp(const MyApp());
    }

    class MyApp extends StatelessWidget {
      const MyApp({Key? key}) : super(key: key);

      @override
      Widget build(BuildContext context) {
        return MaterialApp(
          title: 'Stripe payment gateway in flutter',
          theme: ThemeData(primarySwatch: Colors.blue),
          home: const HomePage(),
        );
      }
    }
STEP 4:
HomePage.dart
import 'package:flutter/material.dart';

class HomePage extends StatelessWidget {
      const HomePage({Key? key}) : super(key: key);

      @override
      Widget build(BuildContext context) {
        return Scaffold(
          body: Container(
            child:  Center(child: Text("Hello World!")),
          ),
        );
      }
    }
Import dependency
import 'package:flutter_dotenv/flutter_dotenv.dart';
import 'package:flutter_stripe/flutter_stripe.dart';
makePayment flunction in onTap
                       onTap: () async {
                        await makePayment();
Full code of container button
    child: InkWell(
                      onTap: () async {
                        await makePayment();
                      },
                      Container(
                        height: 50,
                        width: 90,
                        decoration: BoxDecoration(
                          color: Colors.red,
                          borderRadius: BorderRadius.circular(5),
                          boxShadow: [
                            BoxShadow(
                              color: Colors.grey.withOpacity(0.5),
                              spreadRadius: 2,
                              blurRadius: 2,
                              offset:
                                  Offset(0, 2), // changes position of shadow
                            ),])),
                            ),
makePayment Function
  Map<String, dynamic>? paymentIntent;

  Future<void> makePayment() async {
    try {
      paymentIntent = await createPaymentIntent('2', 'USD');

      //STEP 2: Initialize Payment Sheet
      await Stripe.instance
          .initPaymentSheet(
              paymentSheetParameters: SetupPaymentSheetParameters(
                  paymentIntentClientSecret: paymentIntent![
                      'client_secret'], //Gotten from payment intent
                  style: ThemeMode.dark,
                  merchantDisplayName: 'Ikay'))
          .then((value) {});

      //STEP 3: Display Payment sheet
      displayPaymentSheet();
    } catch (err) {
      throw Exception(err);
    }
  }

  displayPaymentSheet() async {
    try {
      await Stripe.instance.presentPaymentSheet().then((value) {
        showDialog(
            context: context,
            builder: (_) => AlertDialog(
                  content: Column(
                    mainAxisSize: MainAxisSize.min,
                    children: [
                      Icon(
                        Icons.check_circle,
                        color: Colors.green,
                        size: 100.0,
                      ),
                      SizedBox(height: 10.0),
                      Text("Payment Successful!"),
                    ],
                  ),
                ));

        paymentIntent = null;
      }).onError((error, stackTrace) {
        throw Exception(error);
      });
    } on StripeException catch (e) {
      print('Error is:---> $e');
      AlertDialog(
        content: Column(
          mainAxisSize: MainAxisSize.min,
          children: [
            Row(
              children: const [
                Icon(
                  Icons.cancel,
                  color: Colors.red,
                ),
                Text("Payment Failed"),
              ],
            ),
          ],
        ),
      );
    } catch (e) {
      print('$e');
    }
  }

  createPaymentIntent(String amount, String currency) async {
    try {
      //Request body
      Map<String, dynamic> body = {
        'amount': calculateAmount(amount),
        'currency': currency,
      };

      //Make post request to Stripe
      var response = await http.post(
        Uri.parse('https://api.stripe.com/v1/payment_intents'),
        headers: {
          'Authorization': 'Bearer ${dotenv.env['STRIPE_SECRET']}',
          'Content-Type': 'application/x-www-form-urlencoded'
        },
        body: body,
      );
      return json.decode(response.body);
    } catch (err) {
      throw Exception(err.toString());
    }
  }

  calculateAmount(String amount) {
    final calculatedAmout = (int.parse(amount)) * 100;
    return calculatedAmout.toString();
  }
}
STEP 5:
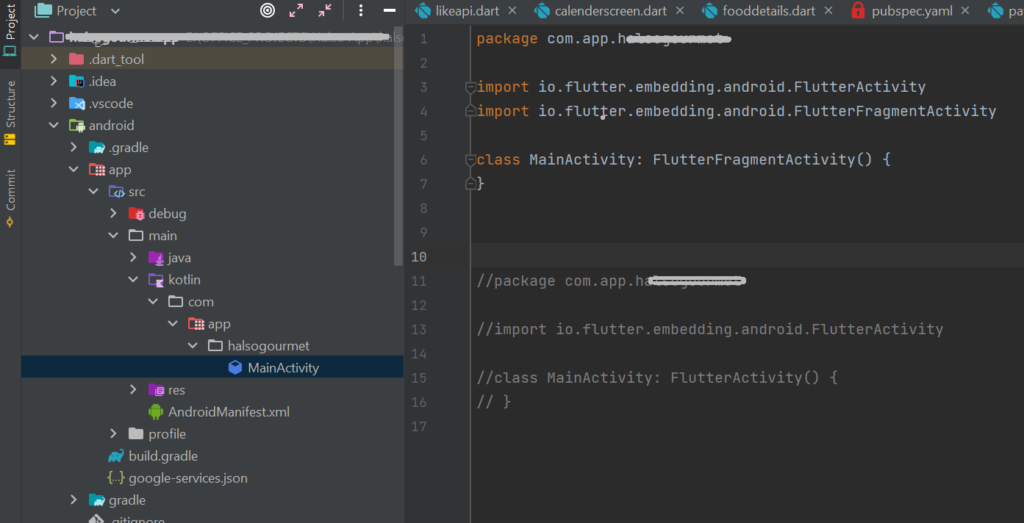
MainActivity.kt Change these line
package com.app.StripeApp

import io.flutter.embedding.android.FlutterActivity
import io.flutter.embedding.android.FlutterFragmentActivity

class MainActivity: FlutterFragmentActivity() {
}
STEP 6:
Change styles.xml files code for theme

Conclusion
The integration of Stripe into your Flutter application is complete.
All you have to do to launch your app is switch from Test mode to Live mode on your dashboard and adhere to Stripe’s guidelines.
Please let me know if you have any questions or comments, and don’t forget to give this post a thumbs up if you found it helpful.
DONE!
Get the whole source code right here.
Related Articles:
- How to Install Flutter in windows 10
- How to Setup Space Between Elements In Flutter
- Flutter Card Widget with Example
- Integrating an API into a Flutter – Working with REST APIs
- Create a simple splash screen in Flutter
- Android Projects with Source Code
- Flutter Interview Questions
- School Database Management System Project
- Create A Simple Splash Screen UI design
- Create Login Page UI Design and Animation For Flutter
- Flutter interview questions 2023


0 Comments