Ready to build your first iOS app? This guide will walk you through creating and running a simple Swift project in Xcode using SwiftUI, the modern framework for building user interfaces across all Apple platforms. We'll skip the old Storyboards and dive straight into code.
Step 1: Create a New Project
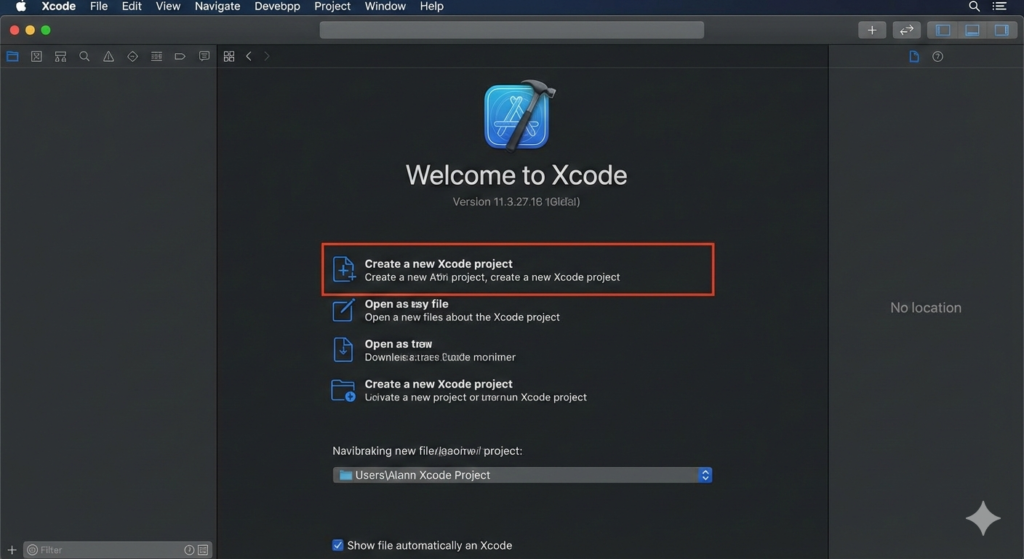
Open Xcode on your Mac. You will be greeted by the welcome screen. Click on "Create a new Xcode project" to get started.
Step 2: Choose the App Template
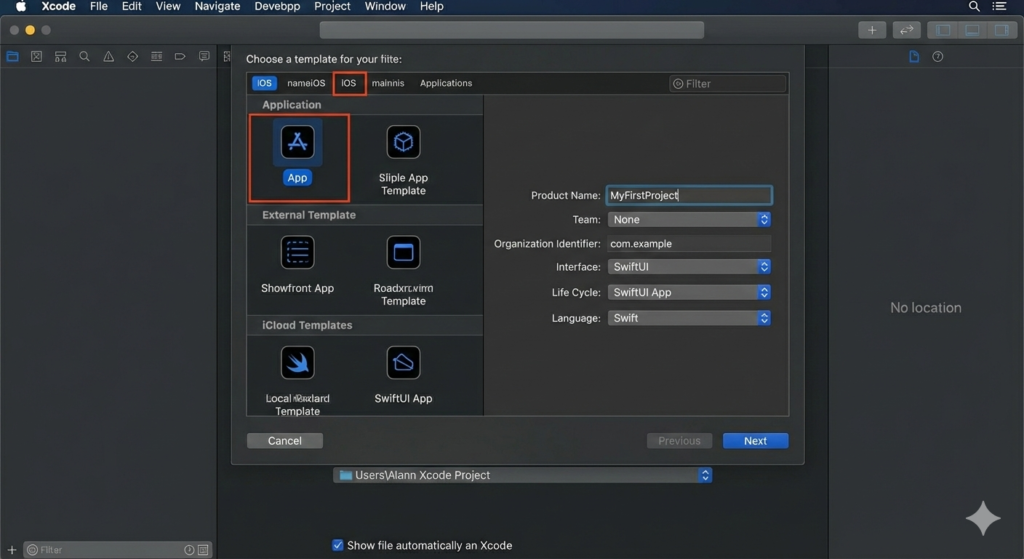
In the template selection sheet, make sure the iOS tab is selected at the top, then choose the App template. Click Next. On the following screen, give your project a name (e.g., "MyFirstProject"). Ensure the Interface is set to SwiftUI, and the Language is set to Swift.
Step 3: Save Your Project
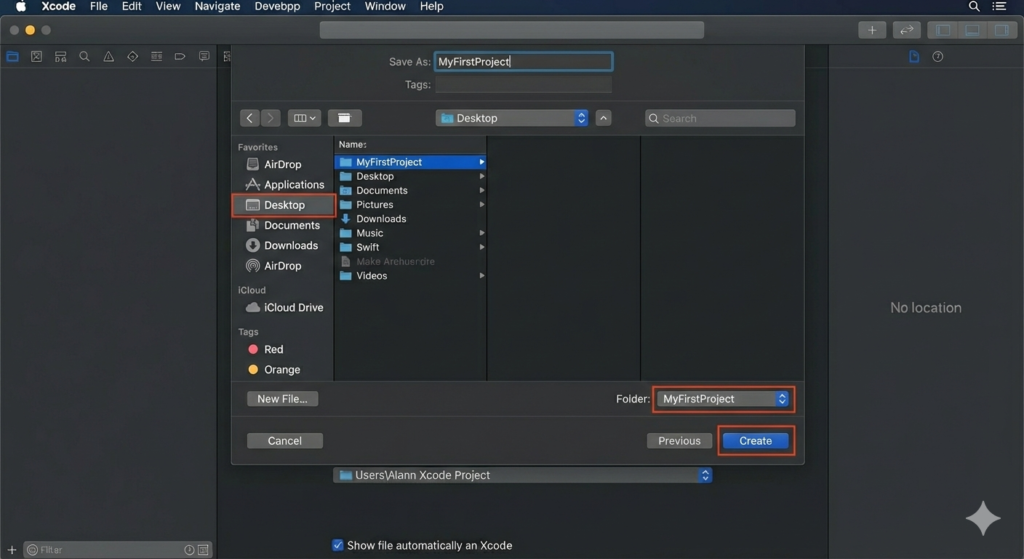
Choose a location on your computer to save your new project, such as your Desktop or a dedicated "Developer" folder. Click Create to finalize the setup.
Step 4: Examine the Code and Run
Xcode will now open your project. In the project navigator on the left, select the ContentView.swift file. You will see the following default code:
ContentView.swift
import SwiftUI

struct ContentView: View {
    var body: some View {
        Text("Hello, Deepika!")
            .padding()
    }
}

struct ContentView_Previews: PreviewProvider {
    static var previews: some View {
        ContentView()
    }
}
This code defines a simple user interface. The ContentView struct conforms to the View protocol, and its body property describes the view's content. In this case, it's a Text view displaying the string "Hello, world!" with some padding around it.
To run your app, make sure a simulator (like "iPhone 14 Pro") is selected in the top toolbar, then click the Run button (the play icon). Xcode will build your project and launch the app in the simulator. You should see "Hello, world!" displayed on the screen.
Congratulations! You've successfully created and run your first SwiftUI project. You can now start exploring and modifying the code to build your own app!
Related Articles
- How to make Ludo app in Flutter with Source Code Step by step
- How to make PDF Reader app in Flutter with Source Code Step by step
- What is package in Flutter (Dart) with example in 2024
- What is class in Flutter(Dart) with example step by step
- Advantage of Flutter with examples in 2024
- Top 15 Amazing Applications Built with Flutter Framework
- Specialized PDF reader designed specifically for music sheets
- Christmas Quote Generator app built with flutter source code
- How to make review and rating ui with flutter stepwise
- How to Upload Your App to Google Play Store in 2026
- GitHub Mac Setup: Upload Your First Project (Step-by-Step)