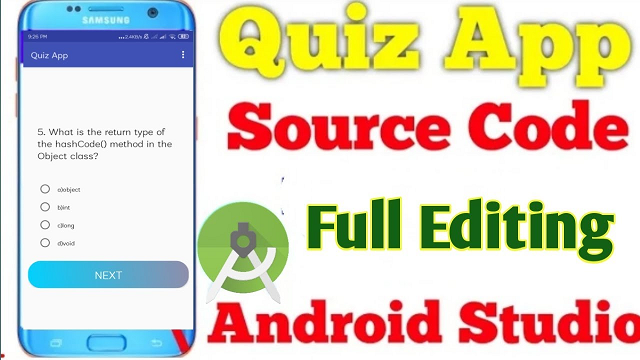
Quiz App is an android based application, and enables the user to undertake a series of questions on Java language. The app is user friendly, and the user shall find it extremely easy to answer the multiple-choice questions. At the end of the quiz, a result-report is generated which states the score. The Quiz app also presents an option to the current user to play the question-round again or quit in between.
This Quiz App was developed as a learning project for Android. It is developed in Android Studio 3.6
- compileSdkVersion – 29
- buildToolVersion – 28-0-3
- minSdkVersion – 17
- targetSdkVersion -29
Again that we are well versed with Activity, Layout, Views etc its time to get our hands dirty, and create our second application. This application will have a science quiz app, and user will have option to answer in True or False. Based on what the user enters, we will show the user, whether they selected the correct option or not by simply showing a message saying Correct or Incorrect.
For Quiz App Open Android Studio and go to File → New → New Project. In the New Project window, enter the Application Name as Quiz and company domain as com.technic.quiz and Click on Next.
QuizActivity.java
package com.technic.javaquiz;

import java.util.List;
import android.os.Bundle;
import android.content.Intent;

import android.util.Log;
import android.view.Menu;
import android.view.View;
import android.widget.Button;
import android.widget.RadioButton;
import android.widget.RadioGroup;
import android.widget.TextView;

import androidx.appcompat.app.AppCompatActivity;

import com.technic.javaquiz.data.DbHelper;


public class QuizActivity extends AppCompatActivity {
    List<Question> quesList;
    int score=0;
    int qid=0;
    Question currentQ;
    TextView txtQuestion;
    RadioButton rda, rdb, rdc, rdd;
    Button butNext;
    @Override
    protected void onCreate(Bundle savedInstanceState) {
        super.onCreate(savedInstanceState);
        setContentView(R.layout.activity_quiz);
        DbHelper db=new DbHelper(this);
        quesList=db.getAllQuestions();
        currentQ=quesList.get(qid);
        txtQuestion=(TextView)findViewById(R.id.textView1);
        rda=(RadioButton)findViewById(R.id.radio0);
        rdb=(RadioButton)findViewById(R.id.radio1);
        rdc=(RadioButton)findViewById(R.id.radio2);
        rdd=(RadioButton)findViewById(R.id.radio3);
        butNext=(Button)findViewById(R.id.button1);
        setQuestionView();
        butNext.setOnClickListener(new View.OnClickListener() {
            @Override
            public void onClick(View v) {
                RadioGroup grp=(RadioGroup)findViewById(R.id.radioGroup1);
                RadioButton answer=(RadioButton)findViewById(grp.getCheckedRadioButtonId());
                grp.clearCheck();
                Log.d("yourans", currentQ.getANSWER()+" "+answer.getText());
                if(currentQ.getANSWER().equals(answer.getText()))
                {
                    score++;
                    Log.d("score", "Your score"+score);
                }
                if(qid<5){
                    currentQ=quesList.get(qid);
                    setQuestionView();
                }else{
                    Intent intent = new Intent(QuizActivity.this, ResultActivity.class);
                    Bundle b = new Bundle();
                    b.putInt("score", score); //Your score
                    intent.putExtras(b); //Put your score to your next Intent
                    startActivity(intent);
                    finish();
                }
            }
        });
    }
    @Override
    public boolean onCreateOptionsMenu(Menu menu) {
        // Inflate the menu; this adds items to the action bar if it is present.
        getMenuInflater().inflate(R.menu.activity_quiz, menu);
        return true;
    }
    private void setQuestionView()
    {
        txtQuestion.setText(currentQ.getQUESTION());
        rda.setText(currentQ.getOPTA());
        rdb.setText(currentQ.getOPTB());
        rdc.setText(currentQ.getOPTC());
        rdd.setText(currentQ.getOPTD());
        qid++;
    }
}
In the next step you will be asked to select the targeted device, on which your application will be supported. Let’s stick with Phone and Tablet for this Quiz App application. And in the drop down saying Minimum SDK choose API 16: Android 4.1 (Jelly Bean), this means our App will work on all the Phones and Tablets with Android Version 4.1 till 7(the latest version). Click on Next button.
Layout File
<RelativeLayout xmlns:android="http://schemas.android.com/apk/res/android"
    xmlns:tools="http://schemas.android.com/tools"
    android:layout_width="match_parent"
    android:layout_height="match_parent"
    tools:context=".QuizActivity">
    <LinearLayout
        android:layout_width="wrap_content"
        android:layout_height="wrap_content"
        android:orientation="vertical"
        android:layout_centerVertical="true"
        android:layout_centerHorizontal="true">
        <TextView
            android:id="@+id/textView1"
            android:layout_width="match_parent"
            android:layout_height="wrap_content"
            android:padding="20dp"
            android:text="Large Text"
            android:textAppearance="?android:attr/textAppearanceLarge" />
        <RadioGroup
            android:id="@+id/radioGroup1"
            android:layout_width="match_parent"
            android:padding="20dp"
            android:layout_height="wrap_content"
            android:layout_weight="0.04" >
            <RadioButton
                android:id="@+id/radio0"
                android:padding="10dp"
                android:layout_width="match_parent"
                android:layout_height="wrap_content"
                android:text="RadioButton" />
            <RadioButton
                android:id="@+id/radio1"
                android:padding="10dp"
                android:layout_width="match_parent"
                android:layout_height="wrap_content"
                android:text="RadioButton" />
            <RadioButton
                android:id="@+id/radio2"
                android:padding="10dp"
                android:layout_width="match_parent"
                android:layout_height="wrap_content"
                android:text="RadioButton" />

            <RadioButton
                android:id="@+id/radio3"
                android:padding="10dp"
                android:layout_width="match_parent"
                android:layout_height="wrap_content"
                android:text="RadioButton" />
        </RadioGroup>


        <Button
            android:id="@+id/button1"
            android:layout_width="340dp"
            android:layout_height="60dp"
            android:background="@drawable/button"
            android:text="Next"
            android:textColor="#ffffff"
            android:textSize="25dp"/>

    </LinearLayout>
</RelativeLayout>
Now its time to add the first Activity to our application. Select the Empty Activity from the avilable options. And click on Next.
Enter the activity name to be Main Activity, and Android Studio will automatically fill the layout file name. It is a standard practice to add suffix Activity in the Activity names and we will follow it. And for layout XML file, it is all words in small and in reverse order, separated by underscore _. Click on Finish to create the Quiz app project.
Manifest File
<?xml version="1.0" encoding="utf-8"?>
<manifest xmlns:android="http://schemas.android.com/apk/res/android"
    package="com.technic.javaquiz">

    <application
        android:allowBackup="true"
        android:icon="@mipmap/ic_launcher"
        android:label="@string/app_name"
        android:theme="@style/AppTheme" >
        <activity
            android:name=".QuizActivity"
            android:label="Quiz App" >
            <intent-filter>
                <action android:name="android.intent.action.MAIN" />

                <category android:name="android.intent.category.LAUNCHER" />
            </intent-filter>
        </activity>
        <activity
            android:name=".ResultActivity"
            android:label="Result !" />

    </application>

</manifest>
Android Studio will take some time, to build everything, so be a little patient. Once Android Studio finished building your project, you will see a new project added to the left project tool window, the activity_science.xml file will be open and in the Preview tool window you will see the preview for your app. Quiz App-If the Preview tool window in not open, go to View → Tool Windows → Preview, and the preview window will show up on the right side.
YouTube Video
There are four Activities in the app :
Main – displays Home Screen of application.
Questions – displays MCQ’s and currents Score.
Results – displays Results after finishing the quiz.
Developers – displays the information about the developers.
Quiz app Download Code
Click below to get the source code android Quiz application.
Download Quiz Apk: Click Here
Download Full Source Code
Click below to get the full source code android Quiz App application.
Conclusion
We have successfully created a Quiz App Android application using Android Studio..