Facebook Twitter Instagram
    DeepCrazyWorld
    Facebook Twitter Instagram Pinterest YouTube
    • FLUTTER
      • FLUTTER APP
        • QRCode
        • Quiz App
        • Chat GPT
        • PDF App
        • News App
        • Fitness App
        • Weather App
        • BMI Calculator
        • GAME APP
        • Ecommerce App
        • wallpaper App
        • Finance app
        • Chat App
        • Wallet App
        • Taxi App
        • Quran app
        • Music player app
      • FLUTTER UI
        • Splash Screen
        • Onboarding Screen
        • Login Screen
        • Card Design
        • Drawer
    • PROJECT
      • Android Projects
      • College Projects
      • FLUTTER APP
      • Project Ideas
      • PHP Projects
      • Python Projects
    • SOURCE CODE
    • ANDROID
      • ANDROID APP
      • GAME APP
      • ANDROID STUDIO
    • MCQ
      • AKTU MCQ
        • RPA MCQ
        • COA MCQ
        • HPC MCQ
        • SPM MCQ
        • Renewable Energy All MCQ
        • Data Compression MCQ
        • Data Structure MCQ
        • Digital Image Processing MCQ
        • Software Engineering MCQ
        • Machine Learning MCQ
        • Artificial Intelligence MCQ
      • D PHARMA MCQ
        • Pharmaceutics – I MCQ
        • Pharmacognosy MCQ
        • Pharmaceutical Chemistry MCQ
        • Biochemistry and Clinical Pathology MCQ
        • Human Anatomy and Physiology MCQ
        • Heath Education and Community Pharmacy MCQ
    • INTERVIEW QUESTIONS
      • Flutter Interview Questions
      • INTERVIEW QUESTIONS
      • Python Interview Questions
      • Coding ninjas solution
    • MORE
      • WORDPRESS
        • SEO
        • TOP 10 WORDPRESS THEME
      • PRODUCTIVITY
      • Program
      • QUOTES
    DeepCrazyWorld
    Home»Android App Development»How to Add subscriptions in Google Play Store – deepcrazyworld
    Android App Development

    How to Add subscriptions in Google Play Store – deepcrazyworld

    DeepikaBy DeepikaAugust 25, 2021Updated:January 19, 2022No Comments3 Mins Read

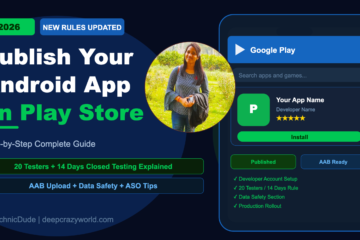
    Add subscriptions in Google Play Store to your app | How to create subscriptions in your google play store console

    1.Open Play Console and go to Subscriptions page (Monetize – Products – Subscriptions).
    2.Click Create subscription.
    3.Enter your subscription details.
    4.Enter pricing details in the “Price” section.
    5.Choose and define additional options in the “Subscription settings” section.

    6.Click Save.

    <img decoding=

    To create subscriptions in your Google Play console you will need to set up a Google Merchant Account first. To set up a Google Merchant Account follow these steps :

    • Log in to your Google Play Console and open the “Settings” tab on the left side menu
    • The profile settings will now be displayed on the right side. Scroll down to the end of the settings page until you see the “Merchant Account “Tab
    • Choose the “Set up a merchant account now” option and follow the instructions displayed
    • After setting up the merchant Account, subscriptions and in app purchases can be created via the “In-app product” tab on the left side of your Google Play console.
    • After selecting the “In-app products” tab, look to the main screen of the Google Play console and you should see the following information displayed :
    • Select the “subscriptions” Tab and click on the “create subscription” button to create a new subscription for your App:

    Table of Contents

    Toggle
    • Let’s create subscriptions in your Google Play console
    • Watch video in Hindi Step by step
    • Watch video in English Step by step
    • create subscriptions in your Google Play console
    • READ MORE

    Let’s create subscriptions in your Google Play console

    • You will now be prompted to fill in the following information :
    • Enter a Product ID for the Subscription. This ID is used to mark the respective Subscription inside your App. The Product ID can consist of letters (lower case A-Z) and numbers (0-9).
      Attention: Product IDs are unique and cannot be altered again once the Subscription has been created.
    • Next you will be prompted to add the title and the description of your Subscription. You can also add additional translations for your in-app purchase by clicking on the “Add Translations” button and selecting additional languages.
    • To conclude the subscription setup you will need to add the price and billing period of the subscription:
    • Adjust the price of the subscription via the “Add a price” Button and enter the default price in the Pop up window.
    • After entering all the necessary information select the status of the Subscription entry accordingly and press the “Save” button in the lower right corner to create the subscription entry.

    Watch video in Hindi Step by step

    Why are my subscriptions not showing on Google Play?
    Where is the subscription in Google Play?
    How do I create a subscription app?
    How can I add 20 RS on Google Play?
    google play console
    google play subscription apps
    in-app purchase subscription tutorial android
    google play subscriptions
    google play console subscription
    google play store subscription cost
    google play subscription free trial
    google play subscriptions not showing up

    Watch video in English Step by step

    Publish app on play store:
    https://youtu.be/60E-dJCgOos

    get unlimited free icon:
    https://www.flaticon.com/

    How to Install Android Studio:
    https://youtu.be/89OSI-fk0E8

    Delete app from play store:
    https://youtu.be/8gyJZy4xojY

    privacy policy for app:
    https://youtu.be/9Lw_thHc5m0

    create subscriptions in your Google Play console


    =========================
    My New laptop: https://amzn.to/2WdaHWW
    My Old Laptop: https://amzn.to/3j6XMyz
    My Boya Mic: https://amzn.to/3D50EUF
    My Mouse: https://amzn.to/383xd7d
    HeadPhone: https://amzn.to/2WclOzd
    My Mobile: https://amzn.to/2UBuYVs
    My Tripod: https://amzn.to/3DidOxQ

    =========================

    Website – https://www.technicdude.in
    Website – https://www.deepcrazyworld.com
    ▐► Facebook 💌 :https://www.facebook.com/Technic-Dude
    ▐►Twitter: https://twitter.com/DeepCrazyWorld?s=08
    ▐►Instagram: https://www.instagram.com/technic_dude26
    ▐► Pinterest : https://in.pinterest.com/deepcrazyworld/
    ​

    Thanks for watching,
    please like and subscribe.

    READ MORE

    Share. Facebook Twitter LinkedIn WhatsApp Telegram Pinterest Reddit Email
    Previous ArticleHow to Publish App on Play Store 2021
    Next Article How to Find Admob Test Ad id |Get Facebook Test Ad id

    Related Posts

    Google play console All basic details Step by step 2023

    Android App Development 9 Mins Read

    How to Update Rejected app from Google play console 2023

    Android App Development 4 Mins Read

    How to Market Your Mobile App On a Budget 2023

    Android App Development 8 Mins Read

    Top 8 High Income Skills You Can Learn In Your Spare Time (updated)

    Android App Development 9 Mins Read

    Leave A Reply Cancel Reply

    Recent Posts
    • Implementing a Dynamic FAQ Screen UI in Flutter Using ExpansionTile March 29, 2025
    • Creating an Instruction UI Screen in Flutter Application March 29, 2025
    • Animated Backgrounds in Flutter: A Complete Guide March 15, 2025
    • How to make Diary App using flutter stepwise using getx August 31, 2024
    • How to Create Music Player UI screen with fully functional in flutter August 30, 2024
    • How to make ListView Builder Ui in flutter with Source Code August 29, 2024
    • Create a TabBar View in flutter with fully functional stepwise August 28, 2024
    • How to create TabBar view in flutter with source code step wise August 27, 2024
    • How to make Heart rate measure app with Flutter stepwise August 26, 2024
    • How to make ChatGpt App in flutter with source code Stepwise August 25, 2024
    Facebook Twitter Instagram Pinterest YouTube
    • About
    • Contact
    • Disclaimer
    • Privacy Policy
    Copyright by DeepCrazyWorld © 2025

    Type above and press Enter to search. Press Esc to cancel.